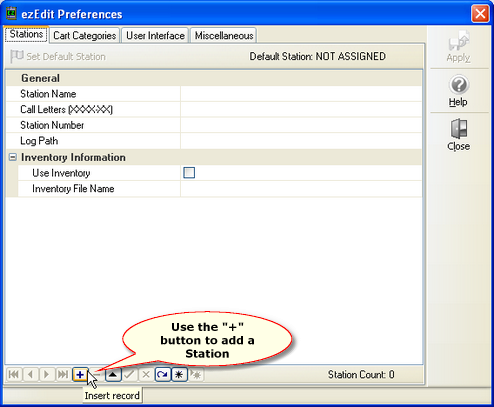
Before using ezEdit, you need to define at least one station for which you will edit and/or create logs. To do so, select the Edit | Preferences menu item on the main display. The preferences dialog will appear, with the Stations tab displayed. Click on the “+” button on the stations tool bar, located near the bottom of the display.

The text cursor will be placed in the Station Name field. Type in a name for the station - the name is used for identification purposes within ezEdit and can be anything you like.
Finish filling in the rest of the information about the station, including the call letters, the station number, path to log files and the inventory information. You can get help on what each field is for and what is needed by clicking on the [Help] button located on the right side of the dialog.
When you have finished filling in the information, click on the “Post Edit” button, which appears as a check mark on the toolbar, as shown:

After posting the station information, the [Apply] button should be enabled, allowing you to apply (save) your changes to the station information.
|
When you click on the [Apply] button, ezEdit validates the station information you entered and will inform you if there problems with the information, including incorrect paths, missing inventory files, etc. |
At this point, you could close the preferences dialog and begin working with logs. If that’s what you wish to do, skip steps 3 and 4, moving directly to step 5.
