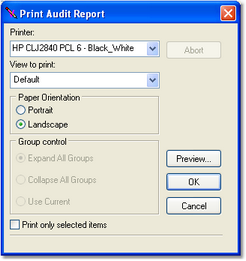
You can print displayed data two ways - either all displayed data or selected records only. The information you're viewing is essentially a print preview - what you see is what you'll get, with a few minor differences. Reports are always printed in landscape orientation, meaning printed the "long way" on the page, to accommodate all columns and still be readable.
Printing a Complete Report
To print a complete report, select the menu item File | Print Report. You can also use the data view's pop-up menu. When you print the entire report, all displayed data is printed. A printer selection dialog is presented, allowing you to choose the target printer, as well as preview the output before it's actually sent to the printer.
During the print process, print status is reflected on the status bar at the lower left edge of the main display.
Printing Selected Records
You can "select" one record or more and print only the selected records. To select multiple records for printing, first select a single record. Then, use either the [Shift-Left-Click] or [Ctrl-Left-Click] mouse combinations. Selected records are highlighted. Finally, [Right-Click] to pop up a menu and select the menu item Print Selected Records Only. Only the highlighted records will be printed. As with printing a full report, you have the option of previewing the printed output before actually sending it to the printer.
|
Printed reports reflect the information displayed on-screen. If you have sorted the information by, say, "Description", that's the way the printed report will be done. If you are viewing a report by hour and have just two of the hours displayed (expanded), just those two hour's detail data will be printed. |
Previewing a Report Prior to Printing
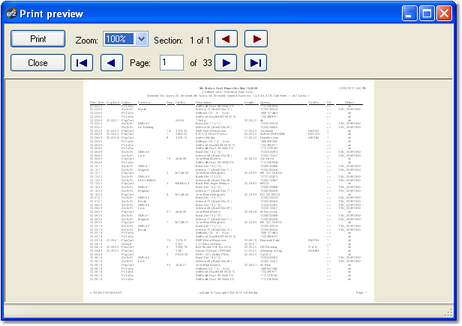
While the ezSuite report display is essentially a preview of what will print, you can get a more complete representation by clicking the [Preview] button in print dialog. The print preview dialog shows the exact header layout and pagination.
When initially displayed, the print preview dialog shows the report as a complete page within the borders of the dialog, as shown in the example. You can page forward and backward using the supplied buttons.
To make the preview more readable, expand the dialog to full-screen and use the [Zoom] control to set the size. Use [Left-Click] to zoom larger when the mouse cursor is over the report image, [Right-Click] to zoom smaller.


