Using crWebBB |

  
|
Using crWebBB |
|
To use crWebBB effectively, you must:
| 1. | Properly configure the application (using Preferences). |
| 2. | Establish communications between the program and host DCS or Maestro unit. If you need help with this item, see the sections on Setting Up DCS or Setting Up Maestro in this document or consult your audio delivery system documentation. |
| 3. | Ensure that you have database information for cart categories and alternate messages, if the alternate message feature is enabled. |
| 4. | Ensure that you have either implemented Maestro’s option to send song title and artist information to remote control applications (see Setting Up Maestro) or that you have imported your music database into crWebBB. See the section on Importing Music in this document for more information. |
|
crWebBB generates the billboard information, writes it to a text file, and optionally, uploads the text file to a remote location via FTP. It does not process the text in any way except to insert the appropriate title and artist information or alternate text into the text templates. If you do not use the FTP upload method to send the file to your web site, you will need to implement another method. Most commonly, a watcher daemon is used to watch the local text file output directory and, on finding an updated file, copying the file to the web site, where it is incorporated into your site's "Now Playing" display. |
Following proper setup, it's a matter of launching crWebBB and letting it run 7x24. Little, if any, interaction with the program is required, other than the occasional check to be sure everything is still running.
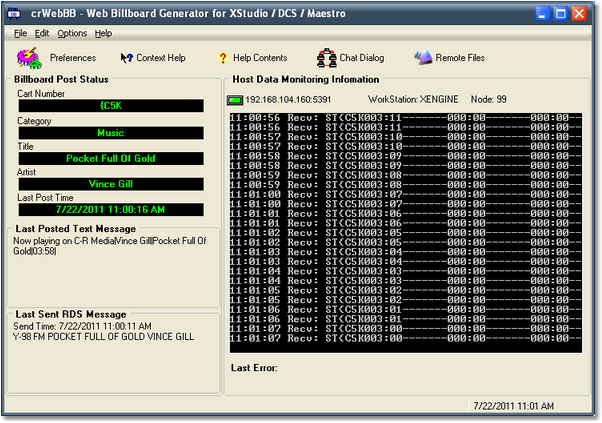
The main display provides several bits of useful information and you should be able to tell from glancing at the screen periodically that everything is running correctly. The main display is informational only. Any maintenance of the system is done from the Edit menu item, then selecting either Preferences or Music Database Maintenance .
|
You can change the visual appearance of the application - just select the main menu item "Options". The default is a skinned appearance. You can select a skin from the menu item "Options | Select Skin". The example dialogs used in this document are the default skin. |