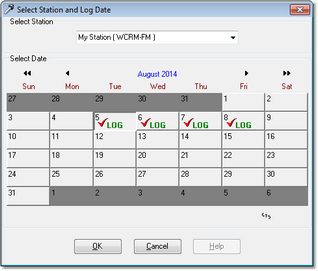
Once you’ve saved your Preference settings, you’ll be returned to the main XStudio Voice Tracker display. To get started voice tracking a log, select the menu item File | Open Log or click on the [Open Log] button. A dialog appears, providing the means to select a log:
Navigate to the month by using the arrow buttons on the dialog and select a log date. Dates that have logs available are displayed with a check mark and the word “LOG”. When you’ve selected a date, click on the [OK] button.
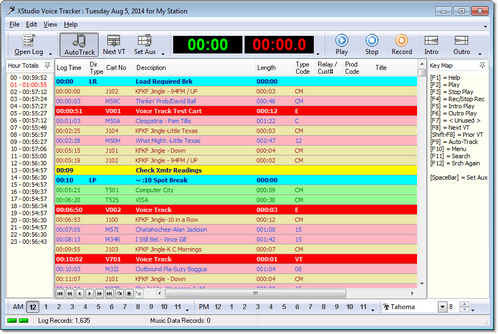
The log will be loaded and displayed, as shown:
For convenience, a key map is displayed as a default, indicating which function keys can be used for voice tracking.
Recording a Voice Track
To record a voice track with full rehearsal, follow these simple steps:
1.Select the hour of the day you want to voice track from the tool bars at the bottom of the display.
2.Jump to the first voice track in the hour, using the [F8] key or by clicking on the [Next VT] button.
3.Ensure the [Auto-Track] button is depressed (as shown).
4.Start the voice track sequence, using the [F4] key or by clicking on the [Record] button.
The sequence will begin – the last few seconds of the audio cart immediately preceding the voice track cart on the log is played, recording of the voice track cart starts automatically at the Aux Mark of the preceding cart. Do your voice work and when you’re ready to start the cart immediately following the voice track, press the [SpaceBar] or click on the [Set Aux] button. The next element will start playing. When you are done talking, stop the recording by pressing the [F4] key or clicking on the [Stop Record] button.
To listen back to your work, press the [F2] key or click on the [Play] button. You can stop playback at any time by pressing the [F3] button or clicking on the [Stop] button.
That’s it! You’ve successfully created your first voice track. To continue tracking the hour, repeat recording steps 2 – 4 as needed.

