Step 2 - Configure iDAF |

  
|
To edit preferences, select Edit | Preferences from the main menu. The tabbed Preferences dialog appears, with the General tab active, as shown here:

If you are using a DCS system or a Maestro system that still utilizes some DCS machines, uncheck the item labeled “Use 64 Stations”. This will reduce the number of available stations (nodes) for distribution to 16, which is the maximum for a DCS system.
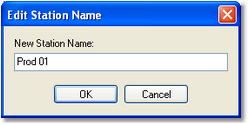
Next, you can assign meaningful names to the stations in the Station Names list. The stations are listed in order of their node number, beginning with 1 and ending with either 16 or 64, depending on whether the “Use 64 Stations” item is checked. To change the generic name assigned for a station, [Double-Click] on the name you wish to change. A small edit dialog appears, allowing you to change the name.

When you have finished editing the station name, click on the [OK] button to complete the name change. Clicking on the [Cancel] button leaves the station name as it was prior to beginning your edit.
If you will be editing cart header information, available only in licensed copies of iDAF, you can also choose whether edited carts are saved as a standard .DAF file or for direct import into an ACP server. To enable direct import to an ACP server, check the item “Save Edited Carts as .DFF Files”.
If you want a standard DCS/Maestro inventory file to be created automatically when a scan of .DAF files is complete, check the item “Auto-Save DCS/Maestro *.DAT file on file scan”. You can also save scan results as a CMINV??.DAT file manually from the main display.
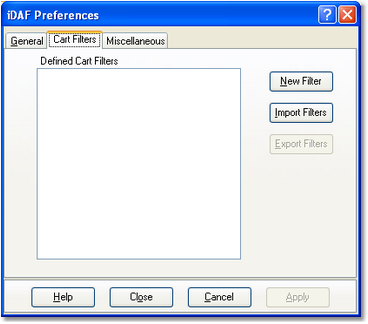
It is useful on occasion to restrict the displayed audio file list to a particular group of carts. While this can be achieved in the main display by filtering a column of data, it is easier to create Cart Filters in Preferences and re-use the filters whenever you like. Cart Filters are created on the second page of the Preferences dialog, as shown here:

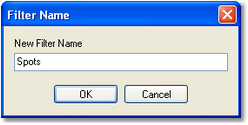
Initially, there are no Cart Filters defined. To create one, either click on the [New Filter] button or touch the [Insert] key. A dialog asking you to provide a name for the new filter is displayed.

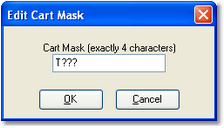
We’ve named this initial filter “Spots” - for commercials. Click [OK] after typing in the name you’ve chosen and a second dialog appears, asking you to enter the first cart mask that will be used with this filter.

Cart masks consist of 4 characters and may include a wildcard in any position. The wildcard character is the question mark (?) character. Here, you can see we’ve indicated that audio files (carts) beginning with the letter “T” and containing any combination of 2nd, 3rd, and 4th characters will be included in the filtered list.
You can create as many cart masks for a filter as you need. There is no real limit to the number of Cart Filters you might create, either.
|
Be sure to save your preference settings when you are done - just click on the [Apply] button to save the settings. |