The type of information you need to edit varies with each log record type, and, to make your task easier, there is a customized edit dialog for each. While each record type varies in information, there are some consistent types of information that will be entered. Each of these information types is handled consistently among the edit dialogs. Many of the edit fields help you speed the process by either presenting a list of choices or making it easier to enter information by interpreting what you mean. The first part of this section provides information on various field types and hints on using them effectively. The latter parts include information specific to a particular log record type.
|
When you are working with a log and wish to edit an item, press the [F3] key or [Double-Click] on the item to automatically bring up the appropriate edit dialog. See the Reference section for a complete list of keyboard shortcuts in edit dialogs. |

Topic Links to Specific Dialogs
Insert Log Item Dialog
When inserting a new log item, a dialog is displayed providing the means to select the type of log item you wish to insert.
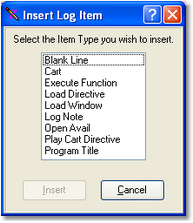
Based on the selected type, a custom dialog specific to the log item type is displayed for data entry.
Navigating Edit Dialogs
You can move through the fields displayed in an edit dialog by pressing the [Tab] or [Enter] key. Either will advance you to the next field or button in the dialog. [Shift-Tab] moves backward through the fields and buttons. Directly select a field for editing using your mouse with [Left-Click].
Most buttons have "accelerator" keys - press and hold the [Alt] key, then press the letter that's underlined on the button. This will have the effect of pressing or clicking on the button.