A report template consists of a group of transaction codes, status codes, play channels, cart filters and a data view. Templates are organized by a user-defined name for each (which must be unique) of up to 30 characters in length. ezSuite stores all templates together in a file in the application directory. See the appendices for a list of files used and/or created by ezSuite.
You may have as many templates as you wish, limited only by available disk space.
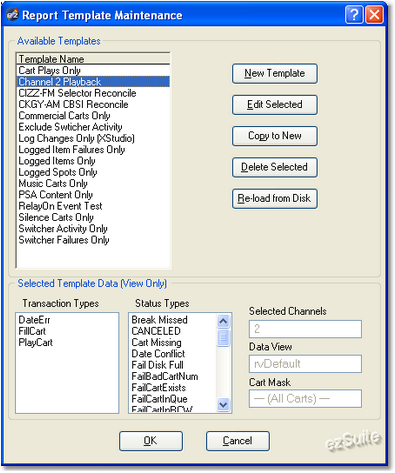
You can create new templates on the fly from the main report window and you can select any of the available templates from the main report window. However, there are times when you may wish to edit, copy or delete templates. Access these functions by selecting the menu item Edit | Report Template Maintenance in the report window. A dialog similar to the one shown here is displayed.
The display contains a list of all available templates by name. The selected template's settings are displayed in the lower panel of the dialog.
Maintenance functions are performed by clicking on clearly-labeled maintenance buttons:
1.New Template. Create a new template. The current report settings are used. You will be prompted for a name for the new template.
2.Edit Template. Edit the selected template. A second dialog will be displayed, allowing you to edit each of the template items.
3.Copy to New. The selected template in the list will be copied to a new template. You will be prompted for the new template name.
4.Delete Selected. The selected template will be deleted. You will be asked to confirm the deletion.
5.Re-Load from Disk. If you have made changes to templates, and do not wish to keep your changes, you can re-load the template information from disk. This action will restore the last saved template information, losing your changes in the process.to templates, added or deleted.
|
Changes made to templates in this dialog are not saved to disk until you click on the [OK] button and exit the dialog. If you click on the [Cancel] button, any changes made are lost and the original template information is restored from the hard disk. |
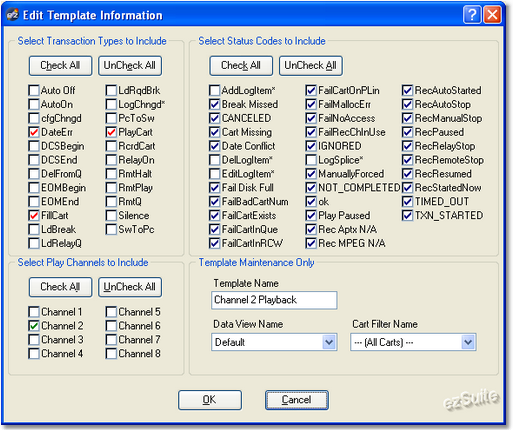
When you click on the [Edit Selected] button (or double-click on a template name in the list), a secondary edit template dialog appears, similar to the example shown here. This dialog is where you make changes to transaction types, status codes, play channels, the data view and cart mask information.
Once you have completed your changes, click on [OK] to accept the revised information, or click on [Cancel] to abort the editing of the template.


