The Remap Input Relays task is used to change or reset input relay mapping for an audio switcher. This task is useful for situations where you may wish to disable (or "unhook") input relay actions used for normal programming, replace them with a different set of actions enabled (or "hooked") to input relays for a special event, and later restore the "default" input relay mapping when programming returns to normal.
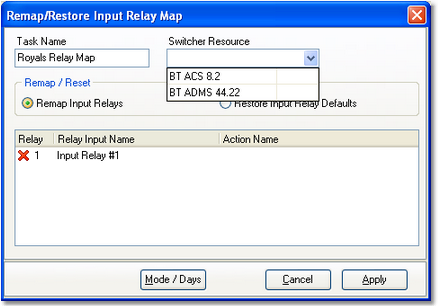
Remap Input Relays - Selecting the Switcher
|
When remapping or restoring input relays with this task, any input relay lock-out values originally assigned to the resource are not changed. |
Remap Input Relays Properties
Items with a check mark in the REQ column require user entry, while unchecked items have default values which can optionally be changed.
Property |
REQ |
Description |
|---|---|---|
Task Name |
|
The user-friendly name of the task. See Common Properties for more information. |
Switcher Resource |
|
Select the audio switcher that will be used for this task from the drop down list. When a device is selected, the appropriate number of input relays and their labels are displayed in the relay map table. If the selected device does not have input relays, you are prompted to select a different device from the list. |
Remap / Reset |
|
Select the radio button item appropriate for what you want to accomplish. The default selection is "Remap Input Relays", which allows you to select each available input relay and associate an Action with it. If the "Restore Input Relay Defaults" radio button item is selected, the Relay Map Table is disabled and when the task is executed, the selected device's original input relay mapping is restored. |
Relay Map Table |
|
Displayed input relays for the selected device are listed, initially with no Actions assigned to any of the input relays. Select the desired input relay and either [Double-Click] on the item or [Right-Click] and select the menu item "Assign Action ..." to display an Action selection dialog. |
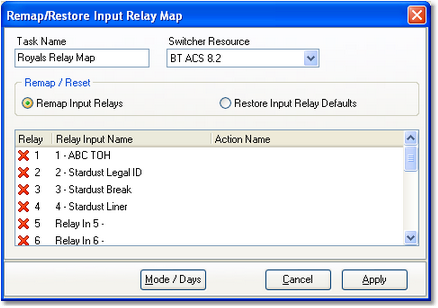
Remap Input Relays - Device Selected
Assigning Actions to Input Relays
When a switcher resource has been selected and the device's input relay list is displayed, you can begin assigning Actions to the input relays. The easiest way is to locate the input relay you want to assign by scrolling through the list.
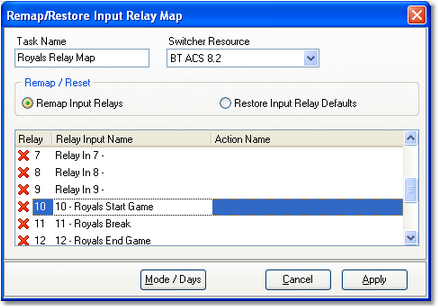
Selecting an Input Relay to Remap
To assign an Action to an input relay, [Double-Click] on the input relay to display the Assign Action to Relay Input dialog. Alternatively, you can [Right-Click] on the selected input relay and select the menu item "Assign Action ..." to display an Action selection dialog.
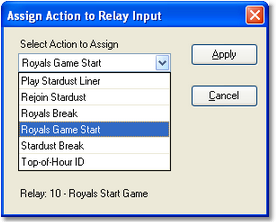
Selecting an Action to assign
When you have completed all of the input relays that need to be mapped, click on the [Apply] button to save the task. A sample of a completed assignments is shown here.
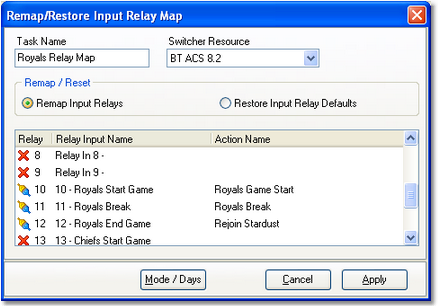
Remap Input Relays complete.
|
To disable all input relays for the device, select the "Remap Input Relays" option and do not assign an Action to any of the available input relays. When the task is executed, it will essentially "unhook" all relays. |
Clearing (Removing) an Action from an Input Relay
If you wish to remove an Action assigned to an input relay, [Right-Click] on the input relay to be changed and select the pop-up menu item "Clear Action..." The Action associated with the selected input relay will be removed.

Assign / Clear Action Pop-up Menu
Restore Input Relay Mapping
To restore the selected switcher resource's default input relay mapping, select the "Restore Input Relay Defaults" radio button item in the Remap / Reset option group. The Relay Map Table is disabled, as it will not be used. Click on the [Apply] button to save the task.
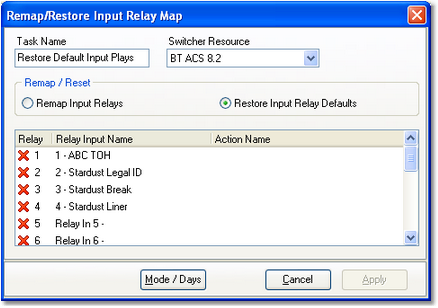
Restore Default Input Relay Mapping
When this task is executed with the Restore Input Relay Defaults option, the switcher resource's original input relay settings are restored from the device's resource record.


