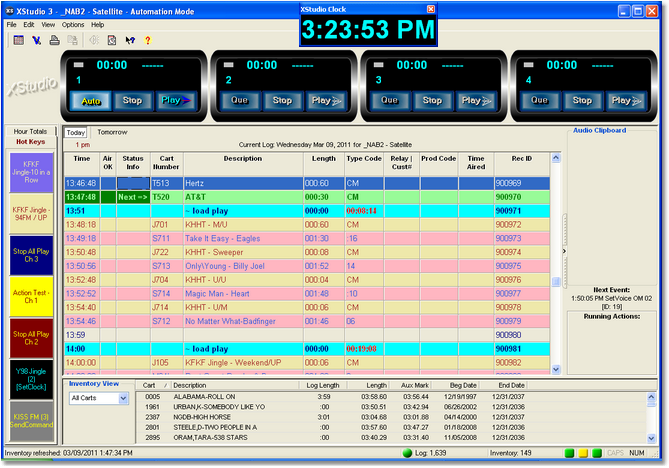
XStudio is fairly straightforward to use as an audio playback system. This section covers a number of topics, including a tour of the main user interface, audio playback and the controls that affect playback, and editing the log (program schedule) to change the content and/or content playback order.
If you're just starting out with XStudio and want to follow the quickest path to audio playback, refer to the Quick Start Guide, which guides you through a short series of steps to get started quickly. For more detailed information on technical aspects of XStudio, keyboard shortcuts, programming XStudio, database and automated task information, refer the Reference section.
Launching XStudio
After XStudio has been installed, there will be shortcuts on your desktop (if you opted to have them created), menu items available in the Start | Programs menu area, and optionally, shortcuts in the Start | Programs | Startup folder to automatically launch both XEngine and XStudio when you login to your system.
If you've not opted to have XStudio start automatically at login, perform the following steps to launch XStudio:
1.Find the desktop shortcut or the menu item for XEngine and launch the program. This starts the audio engine, which handles the actual audio playback.
|
For additional information on launching XEngine, see the XEngine Reference topic. |
2.Find the desktop shortcut or the menu item for XStudio and launch the program. This starts the XStudio main interface where virtually all interaction with XStudio occurs.
When successfully started, the main XStudio display will appear and look similar to the example shown.
The example display shown is typical of the visual appearance of XStudio after the system has been configured in Preferences.
|
Before you can use XStudio successfully, a minimal number of system properties must be customized to meet your needs. See the sections on system configuration and the Quick Start Guide for additional information. |
It is important that XStudio be connected to a host audio server, either XEngine (supplied with XStudio) or a host DCS or Maestro using an RS232 to Ethernet Converter. There is an LED on the status bar at the bottom of the main display that indicates your connection status to a host. In order to actually play audio, the LED color must be green - in other words, a connection exists.

Green = Connected, Red or Yellow = Not Connected
If there is no connection, no audio will be played and attempts to play audio will result in an error message telling you that you are not connected to a host. For information on troubleshooting the audio engine connection, see the Problems Connecting to the Host Audio Engine topic.


