XStudio "hot buttons" are instant-execution buttons that can be programmed to play a cart on demand or to execute an XStudio Action. This topic describes how to set up and use hot buttons.
There are two hot button areas in XStudio. One set is located on the main display and is a minimal set intended for items that might be used frequently by all users. A larger second set is available via the XStudio Cart Wall dialog, which contains user-defined "sets" of 300 buttons. The Cart Wall dialog might be used for individual user sets of buttons.
Main Display Hot Buttons
The XStudio main display hot buttons are located along the left side of the display in an area that features two (2) tabs - one to display the hot buttons, the other to display a list of hourly audio content totals. To view and use the hot buttons, select the Hot Keys tab. The appearance of the buttons will vary, depending on whether or not they have been programmed and the choices you make for coloring the buttons.

XStudio Hot Buttons - Before and After Configuration
Cart Wall Hot Buttons
The XStudio Cart Wall can be displayed or hidden using the main menu's View / Show Cart Wall menu item or by using the key combination [Ctrl-H].
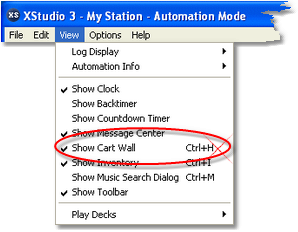
|
The Cart Wall window is hidden as a default and does not display the very first time XStudio is launched. When XStudio is closed, the Cart Wall's state (shown/hidden and screen position ) is recorded and restored the next time XStudio is started. |


For additional information on Cart Wall features and how to use Cart Wall, review the topic Using the XStudio Cart Wall.
Configure a Hot Button Using Drag and Drop
The easiest way to set up a hot button to play a cart is to select an audio item (cart) from the log, the inventory display or (if enabled) the music search dialog, drag it onto the button and drop it. The cart number of the dragged item is recorded, and the cart description becomes the button’s caption. If the target button was not configured or was configured as a Play Cart, the change is immediate. If the button was originally a CCC Function or XStudio Action, you will be prompted to confirm that you want to make the change.
When using drag and drop to configure a hot button for audio playback, if the cart number falls within any of the defined Cart Categories, the category colors are automatically applied. If you wish to modify these properties, use the button configuration dialog, as described in the next section.
Using the Configure Hot Button Dialog
The XStudio button configuration dialog provides access to all hot button properties. In order to configure (program) a button to perform an XStudio Action or perform a CCC Function, you must use the hot button configuration dialog. To display the dialog, [Right-Click] on the button you wish to modify.

The hot button configuration dialog dynamically changes based on the button's selected execution type. Unneeded fields (properties) for the selected button execution type are disabled.
Hot Button Properties
Hot buttons have a number of user-definable properties that are set during the configuration (programming) of a button. These properties control the button's execution type (play audio, initiate an Action), button caption, button color scheme and the specifics of the button's execution type. Selected properties are disabled based on the button execution type.
Property |
Description |
||||
|---|---|---|---|---|---|
Action Type |
Determines what action will be taken when the button is pressed (clicked). Options are Play Cart (default), CCC Function, and XStudio Action. This property also dictates which other properties are enabled when programming a button.
|
||||
Playback Deck |
If the button Action Type is Play Cart, this property is enabled and allows you to select from a drop-down list which of the playback decks on which the cart will be played. For other Action Types, this property is disabled. |
||||
XStudio Action |
If the button Action Type is XStudio Action, this property is enabled. Select the Action you wish to execute when the button is clicked from the drop-down list of available Actions. For other Action Types, this property is disabled. |
||||
Cart No | |
This property is used for the cart number if the Action Type is Play Cart.
If the Action Type is CCC Function, this property is used to enter the function name.
This property is automatically maintained if the Action Type is an XStudio Action. As you change the Action Type, the label for this property changes to reflect the correct type of information that is required. |
||||
Caption |
The text (caption) that will be displayed on the button to identify the button's purpose. The maximum length of text you enter is limited to 25 characters. |
||||
Background Color |
The button's background color. Select a color from the drop-down list or by using the color customization dialog. You can also use the [Use Last Colors] or [Use Default Colors] buttons to assign both background and text color simultaneously. |
||||
Text Color |
The button's text color. Select a color from the drop-down list or by using the color customization dialog. You can also use the [Use Last Colors] or [Use Default Colors] buttons to assign both background and text color simultaneously. |


Programming a Cart Play
To configure a hot button to play a cart when clicked, select Play Cart as the Action Type. Enter the cart number you wish to play in the Cart No field, exactly 4 characters, as shown in the Play Cart Configuration graphic above.
Enter a caption of your choosing - this becomes the button text and should describe the audio that will be played when the button is clicked.
|
The quickest way to program a hot button to play a cart is to drag a cart from the log or from the inventory onto the button. Then, open the hot button configuration dialog to make any desired changes in the button caption and button colors. |
When you have completed the button configuration, click on the [Apply] button to make your changes effective. Use the [Cancel] button to discard any changes, keeping the button configuration as it was before you began editing properties
Programming an XStudio Action
To configure a hot button to execute an XStudio Action when clicked, select XStudio Action as the Action Type. The display will update and look similar to the example.

Select the Action to perform from the drop-down list of available Actions under the Select XStudio Action label. The Action Name property is automatically updated with your selected Action name.
Enter a caption of your choosing - this becomes the button text and should describe what the button will do when clicked.
When you have completed the button configuration, click on the [Apply] button to make your changes effective. Use the [Cancel] button to discard any changes, keeping the button configuration as it was before you began editing properties.
Programming a CCC Function
To configure a hot button to have a host DCS or Maestro system execute a CCC Function, select CCC Function as the Action Type. The display will update and look similar to the example.

Enter the name of the function you want the host DCS or Maestro system to execute exactly as it appears in the host system.
|
CCC Function names are case sensitive! Make sure you enter the function name exactly as it appears in the host DCS or Maestro system. The maximum allowable length of the function name is 25 characters. The host system may restrict a function name length to fewer characters. |
Enter a caption of your choosing - this becomes the button text and should describe what the button will do when clicked.
When you have completed the button configuration, click on the [Apply] button to make your changes effective. Use the [Cancel] button to discard any changes, keeping the button configuration as it was before you began editing properties.
Clearing a Button Configuration
You can "erase" the contents of a button using the [Clear] button located at the bottom of the dialog. Clearing a button erases the cart number and description information, resets the button colors to the default background and text colors and resets the Action Type to Play Cart.
Click on the [Apply] button to complete the action. The button's stored properties are erased.