Printed Reports (Pro Version) |

  
|
The Pro version of iDAF includes a powerful, user-customizable printed report system. Content of the report is controlled by the displayed data, making it a true WSISYG printing system.
Print preview with the ability to customize settings like the report title, margins, page orientation, and more is included, along with customizing dialogs available either from the main display or from within the print preview window.
Custom settings can be saved to a user-defined file and later re-used, so once you have tweaked a report to print exactly as you want it, you can save those settings and later recall them.
The main task in setting up a report is deciding which data to print. The information printed is controlled by the displayed audio list - columns that are displayed, column widths, sorting, grouping, and filtering. So, the first thing to do is organize the audio list display (also known as a grid) so that just the information you want printed is displayed. For additional information on organizing the audio list display, see the section on Working with the Cart Display.
|
Column widths are important in setting up the display. If the File Path column, for instance, does not display the full path because the column width is too narrow, what you are seeing on-screen is what the printed report will look like. You may wish to adjust column widths so all the information for a given item is displayed. You can [Right-Click] on a column header (the title or label for the column) and select the ‘Best Fit" menu item to have the application automatically adjust the selected column’s width so all information is displayed. |
The color scheme of the displayed data is preserved when printing a report. You can change the visual appearance on-demand to create the desired look for a printed report.
Once you have the data you wish to print displayed in the way you wish it to appear when printed, you’re ready to either simply print the report or preview it and adjust some of the other settings.
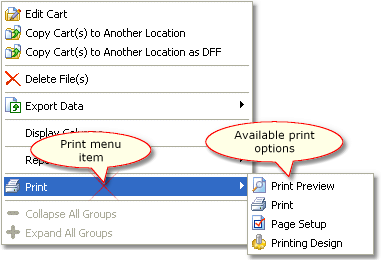
To initiate print actions, use the main menu (File | Print), the print toolbar or the cart list pop-up menu, as shown here.
Print Toolbar

Cart List Pop-up Menu
Changing page setup information and modifying design settings are available two ways; 1) from the main menu, print toolbar or the cart list pop-up menu on the main display; and 2) from within the Print Preview window.